Mosquitoes are not only annoying but also potential carriers of diseases like malaria and dengue fever. Keeping these pests out of your home is essential for a comfortable and healthy living environment. While there are many store-bought solutions, a DIY magnetic mosquito net screen is an effective and cost-efficient alternative. This tutorial will guide you through creating your own mosquito net screens, saving money while keeping your home bug-free.
Materials Needed
Before you start, gather all the necessary materials. Here’s what you’ll need:
- Magnetic tape
- Mosquito netting
- Scissors
- Measuring tape
- Sewing kit or fabric glue
- Velcro strips
Having everything on hand before you begin will make the process smoother and more enjoyable.
Choosing the Right Mosquito Netting
Not all mosquito netting is created equal. When choosing the right netting, consider the following:
- Mesh Size : Ensure the holes are small enough to keep mosquitoes out.
- Durability : Choose a material that can withstand wear and tear.
- Transparency : Opt for netting that doesn’t obstruct your view.
Popular choices include polyester and nylon netting, which are both durable and effective.
Measuring Your Windows
Accurate measurements are crucial for a snug fit. Use a measuring tape to measure the height and width of your window. Add an extra inch to each measurement to ensure complete coverage and allow room for attaching the netting.
- Tip : If your window has an irregular shape, measure the widest and tallest parts.
Cutting the Mosquito Netting
Once you have your measurements, lay out the mosquito netting on a flat surface. Use a marker to outline the dimensions and cut along the lines with sharp scissors. Ensure the cuts are straight to avoid gaps.
- Pro Tip: Use a cutting mat and rotary cutter for the cleanest edges.
Preparing the Magnetic Tape
Magnetic tape comes in various types, including adhesive-backed and sew-on varieties. Choose the one that best suits your needs.
- Cutting the Tape: Measure and cut the magnetic tape to match the perimeter of your window. Ensure you have enough to go all the way around.
Attaching the Magnetic Tape to the Mosquito Netting
There are a couple of methods to attach the magnetic tape to the netting:
- Adhesive-Backed Tape: Simply peel off the backing and press the tape onto the netting.
- Sew-On Tape: Use a sewing kit to stitch the tape along the edges of the netting. This method provides a stronger bond.
Ensure the tape is securely attached to prevent any gaps where mosquitoes could enter.
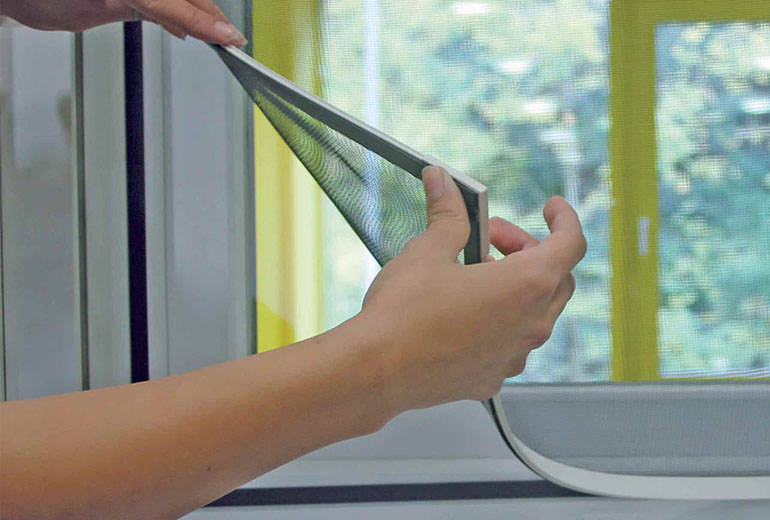
Installing the Mosquito Net Screen on Windows
Now that your mosquito netting is prepared, it’s time to install it on your windows. Here’s how:
- Clean the window frame to ensure the magnetic tape adheres well.
- Attach the magnetic tape (the side without the netting) to the window frame.
- Align the netting with the magnetic tape on the frame, ensuring a tight fit.
- Tip: Start at the top and work your way down to avoid wrinkles.
Using Velcro for Added Security
For additional security, you can use Velcro strips. Attach one side of the Velcro to the window frame and the other to the netting. This ensures the net stays in place even in windy conditions.
- Benefits: Velcro makes it easy to remove and reattach the netting when needed.
Testing Your DIY Mosquito Net Screen
After installation, it’s essential to test your mosquito net screen:
- Check for Gaps: Ensure there are no gaps around the edges.
- Make Adjustments: If you find any gaps, adjust the magnetic tape or Velcro strips accordingly.
Maintenance Tips
To keep your mosquito net screens in good condition:
- Cleaning: Gently wash the netting with mild soap and water when it gets dirty.
- Storage: When not in use, roll up the netting and store it in a dry place.
Benefits of DIY Magnetic Mosquito Net Screens
Creating your own mosquito net screens comes with several benefits:
- Cost Savings: DIY solutions are generally cheaper than store-bought options.
- Customizability: You can tailor the netting to fit any window size or shape.
Common Mistakes to Avoid
Avoid these common pitfalls to ensure a successful project:
- Incorrect Measurements: Double-check your measurements to ensure a proper fit.
- Poor Attachment Methods: Ensure the magnetic tape or Velcro is securely attached.
Additional Tips and Tricks
Here are some extra tips to enhance your DIY mosquito net screens:
- Durability: Reinforce the edges with extra stitching or fabric glue.
- Aesthetics: Choose a netting color that matches your decor.
Conclusion
Creating your own magnetic mosquito net screens is a rewarding project that can save you money and keep your home bug-free. With a few simple materials and some careful measurements, you can enjoy a comfortable, mosquito-free environment. So why not give it a try?
FAQs
With proper care, your DIY mosquito net can last several years. Regular cleaning and careful handling will extend its lifespan.
Yes, you can use the same method to create mosquito net screens for doors. Just adjust the measurements accordingly.
Yes, using magnetic tape and Velcro makes it easy to remove and reattach the screens as needed.
For oddly shaped windows, measure the widest and tallest parts and cut the netting to fit. You may need to make additional adjustments during installation.
Yes, you can use adhesive-backed or sew-on magnetic tape depending on your preference and the materials you have available.